<?xml version="1.0" encoding="UTF-8"?>
<feed xmlns="http://www.w3.org/2005/Atom" xml:lang="en">
  <title>Kristopher Baker</title>
  <subtitle>Senior product engineer with deep iOS roots, building consumer product systems, developer tooling, and practical AI-assisted workflows from Tokyo.</subtitle>
  <link href="https://krisbaker.com/" rel="alternate"/>
  <link href="https://krisbaker.com/atom.xml" rel="self" type="application/atom+xml"/>
  <id>https://krisbaker.com/</id>
  <generator version="0.13.0">Inkwell</generator>
  <updated>2026-06-02T12:34:39Z</updated>
  <author>
    <name>Kristopher Baker</name>
    <email>hello@krisbaker.com</email>
  </author>
  <entry>
    <title>Shikisha: Building LLM Workflows in Swift</title>
    <link href="https://krisbaker.com/posts/shikisha-building-llm-workflows-in-swift/" rel="alternate"/>
    <id>https://krisbaker.com/posts/shikisha-building-llm-workflows-in-swift/</id>
    <updated>2026-06-02T12:34:39Z</updated>
    <published>2026-06-02T12:34:39Z</published>
    <content type="html"><![CDATA[<p>I have been building more AI-assisted tools in Swift lately, and I kept running into the same awkward edge.</p>
<p>Calling an LLM from Swift is easy.</p>
<p>Keeping the surrounding workflow understandable and maintainable is the hard part.</p>
<p>The hard part starts once the feature becomes an actual system: prompts, structured output, retries, streaming, tools, retrieval, memory, tests, and a UI that should still feel like a normal Apple-platform app.</p>
<p>That is why I started building <a href="https://github.com/KristopherGBaker/Shikisha">Shikisha</a>, a Swift-native take on LangChain-style workflows for macOS and iOS. It is still early, currently <code>0.1.0</code>, but it has reached the point where I am using it in real projects instead of just sketching examples around it.</p>
<h2>The Problem Was the Glue</h2>
<p>Most LLM demos begin in a reasonable place: send a few messages, get text back, print the answer.</p>
<p>That is enough for a toy chatbot. It is not enough for the kind of tools I have been building.</p>
<p><a href="https://github.com/KristopherGBaker/JPResume">JPResume</a>, for example, turns a western resume into Japanese 履歴書 and 職務経歴書 formats. The model is useful there, but only in certain places. I still want deterministic parsing where possible. I want validation between stages. I want structured JSON back from the model, not a nice paragraph that looks plausible. I want to inspect intermediate artifacts before they become a PDF I might send to a company.</p>
<p>Once a tool has those constraints, the model call becomes one step in a larger system.</p>
<p>Before Shikisha, I could still build that system in Swift, but each project carried its own small pile of glue code:</p>
<ul>
<li>one-off provider wrappers</li>
<li>handwritten JSON parsing</li>
<li>ad hoc retry logic</li>
<li>duplicated streaming adapters</li>
<li>separate mock implementations for tests</li>
</ul>
<p>None of it was individually hard, but it made each new project feel like starting over.</p>
<p>With a shared workflow shape, those pieces become composable parts instead of per-project scaffolding.</p>
<p>I wanted the same basic vocabulary to work across small chains, RAG pipelines, tool-using agents, and app UI.</p>
<h2>A Swift Shape for LangChain Ideas</h2>
<p>Shikisha borrows ideas from LangChain, but the implementation is written for Swift rather than translated line by line.</p>
<p>Most AI tooling ecosystems assume Python. That works well for experiments and backend services, but Apple-platform apps eventually need the workflow to coexist with SwiftUI, structured concurrency, app state, testing, sandboxing, and platform-native APIs.</p>
<p>I also wanted workflows that could live directly inside Apple-platform apps instead of assuming a separate Python orchestration backend.</p>
<p>That is the part I wanted in Swift.</p>
<p>A way to make LLM workflows feel like normal typed application code instead of a separate scripting layer bolted onto the side.</p>
<p>The core idea is one protocol:</p>
<pre><code class="language-swift">public protocol Runnable&lt;Input, Output&gt;: Sendable {
    associatedtype Input: Sendable
    associatedtype Output: Sendable
    func invoke(_ input: Input) async throws -&gt; Output
}</code></pre>
<p>Prompt templates, chat models, output parsers, retrievers, and whole chains can all be <code>Runnable</code>. That means a simple prompt-model-parser pipeline can read top to bottom:</p>
<pre><code class="language-swift">let chain = ChatPromptTemplate.fromTuples([
    .system("Answer concisely."),
    .human("{question}")
])
.pipe(model)
.pipe(StringOutputParser())

let answer = try await chain.invoke(["question": "What is Swift Concurrency?"])</code></pre>
<p>The important part is not the operator. It is the contract.</p>
<p>If a prompt produces messages, and a model accepts messages, the compiler can check that connection. If a parser expects an <code>AIMessage</code>, the model has to provide one. When a chain works, it can be invoked, batched, retried, wrapped with callbacks, or tested with a fake model in the same style as any smaller piece.</p>
<pre class="mermaid">flowchart LR
    prompt[Prompt template]
    model[Chat model]
    parser[Output parser]
    tools[Typed tools]
    memory[Memory]
    stateGraph[StateGraph]
    callbacks[Callbacks]

    prompt --&gt; model --&gt; parser
    model --&gt; tools
    tools --&gt; model
    model --&gt; memory
    memory --&gt; model
    parser --&gt; stateGraph
    callbacks -.-&gt; model
    callbacks -.-&gt; tools
    callbacks -.-&gt; stateGraph</pre>
<p>Shikisha also uses the Swift tools I would expect to reach for in 2026: structured concurrency, <code>Sendable</code> types, <code>AsyncSequence</code> streaming, <code>Codable</code> shapes for provider payloads, and Swift Package Manager as the normal installation path.</p>
<h2>What Is Included So Far</h2>
<p>The current release covers the pieces I keep needing.</p>
<h3>Models and Prompts</h3>
<ul>
<li>chat model adapters for OpenAI, Anthropic, Google Gemini, and Ollama</li>
<li>prompt templates</li>
<li>output parsers, including structured output helpers</li>
</ul>
<h3>Retrieval and Indexing</h3>
<ul>
<li>document loaders, text splitters, embeddings, and vector stores</li>
<li>retrievers for RAG, including vector, BM25, hybrid, MMR, multi-query, parent-document, time-weighted, self-querying, and contextual compression</li>
<li>incremental indexing so changed documents do not always require re-embedding everything</li>
</ul>
<h3>Agents and Workflows</h3>
<ul>
<li>memory for conversations</li>
<li>typed tools and a tool-calling agent loop</li>
<li><code>StateGraph</code> for cyclic or stateful workflows</li>
</ul>
<h3>Observability and Testing</h3>
<ul>
<li>callbacks for tracing, usage, cost tracking, and other side effects</li>
<li><code>FakeChatModel</code> and local embeddings for offline examples and tests</li>
</ul>
<p>That list sounds large, but the useful thing is that the pieces share a shape. A RAG chain and a basic one-question prompt are not separate worlds. They are different arrangements of the same few ideas.</p>
<p>You can run the example suite without an API key:</p>
<pre><code class="language-bash">swift run ShikishaExamples
swift run ShikishaExamples basicChain
swift run ShikishaExamples ragPipeline</code></pre>
<p>Tests and demos should not depend on a live provider whenever the behavior under test is the workflow itself.</p>
<h2>The Documentation Is Part of the Project</h2>
<p>I recently added full <a href="https://krisbaker.com/Shikisha/documentation/shikisha/">DocC documentation and tutorials</a>, which changed how the project feels.</p>
<p>The docs now include conceptual guides for Swift developers who are new to LLM app patterns, plus feature articles for chat models, prompts, output parsers, structured output, documents, embeddings, retrievers, memory, agents, graphs, indexing, observability, and resilience.</p>
<p>The tutorials are more practical. They walk through building:</p>
<ul>
<li>a streaming chatbot with memory</li>
<li>a RAG app that answers from your own documents</li>
<li>a tool-using agent</li>
<li>a small coding agent with file tools</li>
<li>a universal SwiftUI app around that agent</li>
</ul>
<p>The coding-agent tutorial is a good example of why I wanted this framework in Swift. A surprising amount of an AI coding assistant is just a model, a few file tools, and a loop. The details still matter: sandbox paths, typed tool arguments, tool specs, memory, callbacks, and deciding when the model can act. But once those pieces have names, the workflow is easier to reason about.</p>
<p>Even the agent loop stays small enough to read:</p>
<pre><code class="language-swift">let agent = ToolCallingAgent(
    model: model,
    tools: [readFileTool, editFileTool],
    maxIterations: 8
)

let result = try await agent.run([
    SystemMessage(content: "You are a coding assistant working in this project."),
    HumanMessage(content: "Summarize the TODOs in this project.")
])</code></pre>
<p>It also becomes easier to move from a command-line experiment into a SwiftUI app without rewriting the whole mental model in another language.</p>
<h2>Where I Am Already Using It</h2>
<p>JPResume is the first public project where Shikisha fits naturally.</p>
<p>The resume pipeline needs model calls, structured output, validation, and reviewable intermediate files. Shikisha gives me a cleaner way to express those stages without every stage owning its own provider wrapper or parser convention. It does not remove the hard product decisions, like what the model should be allowed to infer, or how strict validation should be. It just gives the workflow a better foundation.</p>
<p>I am also using Shikisha in another project that I will write about later. That project pushed on a different side of the library: agent behavior, tools, and app integration. I am not ready to describe it yet, but it has been useful as a second check that Shikisha is not only shaped around one resume tool.</p>
<p>That is usually the moment when abstractions start proving themselves. Not when the first demo works, but when the same abstractions survive a second project with different pressure.</p>
<h2>What Still Feels Early</h2>
<p>Shikisha is not a mature ecosystem. It is a young Swift package, and the API may still move as the real use cases sharpen.</p>
<p>There are also places where the older approach is still fine. If all you need is one provider call behind one button, adding a framework might be more structure than the feature deserves. A small direct <code>URLSession</code> call can be the right answer.</p>
<p>Shikisha starts to matter when the workflow becomes more than the call: when you need a repeatable chain, retrieval, structured output, tool execution, memory, tracing, retries, streaming, or tests that should run without hitting a provider.</p>
<p>I am not trying to make every AI feature look elaborate. I am trying to make the elaborate ones less fragile.</p>
<h2>What Changed</h2>
<p>The interesting part for me is not that Shikisha can call models.</p>
<p>It is that the same abstractions now survive across:</p>
<ul>
<li>command-line experiments</li>
<li>SwiftUI apps</li>
<li>retrieval pipelines</li>
<li>typed tool execution</li>
<li>local testing</li>
</ul>
<p>That is the point where a library starts becoming infrastructure instead of just a demo.</p>
<p>The documentation is here:</p>
<p><a href="https://krisbaker.com/Shikisha/documentation/shikisha/">krisbaker.com/Shikisha/documentation/shikisha</a></p>
<p>The repo is here:</p>
<p><a href="https://github.com/KristopherGBaker/Shikisha">github.com/KristopherGBaker/Shikisha</a></p>
<p>If you build Swift apps and have been curious about adding LLM workflows without leaving the Apple-platform toolchain, Shikisha is my current answer. It is still early, but it is already past the point of being just an experiment.</p>]]></content>
  </entry>
  <entry>
    <title>JPResume: Turning a Western Resume Into a Japanese One</title>
    <link href="https://krisbaker.com/posts/jpresume-japanese-resume-tool/" rel="alternate"/>
    <id>https://krisbaker.com/posts/jpresume-japanese-resume-tool/</id>
    <updated>2026-04-20T12:00:00Z</updated>
    <published>2026-04-20T12:00:00Z</published>
    <content type="html"><![CDATA[<video autoplay muted loop playsinline>
  <source src="https://krisbaker.com/posts/jpresume-japanese-resume-tool/jpresume.mp4" type="video/mp4">
  <img src="https://krisbaker.com/posts/jpresume-japanese-resume-tool/jpresume.png" alt="Man wondering how to write a Japanese resume">
</video>
<p>In the last couple of months, two different people asked if I could share my Japanese-style resume. Not my English one. The 履歴書 and 職務経歴書 — the formats Japanese companies actually ask for when you apply.</p>
<p>Both times, my answer was the same awkward “let me get back to you on that.”</p>
<p>My English resume was in decent shape. My Japanese one was a pile of half-finished notes, already out of date the moment I touched the English version. Rewriting both by hand every job cycle, in a second language, was not going to happen.</p>
<p>So I built <a href="https://github.com/KristopherGBaker/JPResume">JPResume</a>, a small Swift CLI that turns a western-style resume into both Japanese formats and keeps them in sync.</p>
<h2>Why a Japanese Resume Is a Different Problem</h2>
<p>If you have only written western resumes, it is tempting to treat the Japanese versions as a translation job. They are not.</p>
<p>
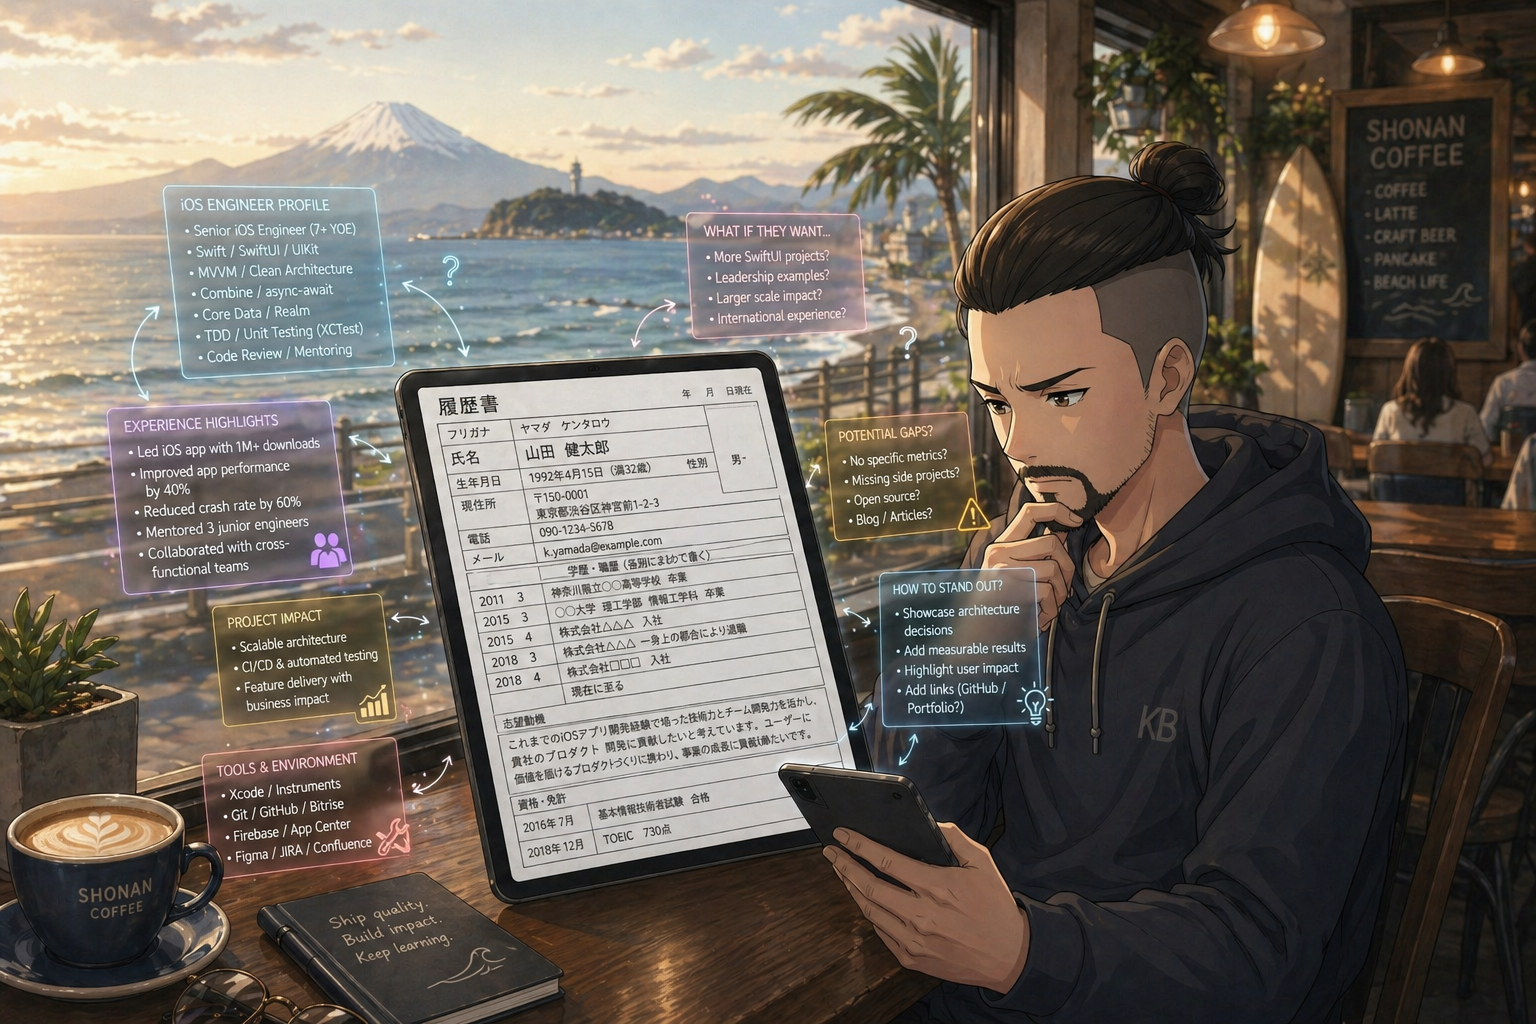
A 履歴書 (rirekisho) is a grid form: name, furigana, photo slot, education and work history with year/month columns, licenses, 志望動機, and 本人希望記入欄. There are conventions for marking your current role, ending the work history section with <code>「現在に至る」</code>, and choosing western years or Japanese era dates. Some companies care about these details. Some do not. None of it is obvious the first time.</p>
<p>A 職務経歴書 (shokumukeirekisho) is the free-form counterpart. This is where the actual career story lives: 職務要約, role details, skills, achievements, and 自己PR. The phrasing conventions are their own skill. “Drove a 29.8% increase in sign-ups” reads naturally in English. In Japanese, something like <code>新規会員登録数の29.8%増加に寄与</code> fits better.</p>
<p>Then there is the alignment problem. Your English and Japanese resumes need to tell the same story, with the same dates, titles, and emphasis. When they drift, you usually notice at the worst possible moment.</p>
<p>That is the part a tool can help with.</p>
<h2>How It Works</h2>
<p>The pipeline is boring on purpose: deterministic where possible, LLM-assisted where useful, and reviewable in between.</p>
<pre class="mermaid">flowchart LR
    parse[Parse]
    normalize["Normalize (LLM)"]
    repair[Repair]
    validate[Validate]
    generate["Generate (LLM)"]
    render[Render]

    parse --&gt; normalize --&gt; repair --&gt; validate --&gt; generate --&gt; render</pre>
<p><strong>Parse</strong> is deterministic. It accepts markdown, DOCX, or PDF and produces a rough structured version. Markdown goes through a parser. DOCX and PDF go through text preprocessing, because once text comes out of those formats, the structure is mostly gone. Scanned PDFs fall back to Vision OCR.</p>
<p><strong>Normalize</strong> is where the LLM first appears. It combines the parsed resume with <code>jpresume_config.yaml</code> — kanji name, furigana, address, education, certifications, and other Japan-specific ground truth — and produces a normalized structure. Dates become real integers. Bullets are classified as achievements or responsibilities. Skills are grouped into categories. The model is explicitly told not to invent anything. Ambiguous dates should be flagged with low confidence, not guessed.</p>
<p><strong>Repair</strong> is deterministic again. It sorts roles, reconciles overlapping dates, and fixes <code>is_current</code> inconsistencies. <strong>Validate</strong> surfaces what remains: overlaps, low-confidence entries, suspicious gaps, or total years that look off.</p>
<p><strong>Generate</strong> produces the rirekisho and shokumukeirekisho JSON. <strong>Render</strong> turns those into markdown and native PDFs using CoreGraphics and Hiragino Sans, so the Japanese typography looks intentional instead of falling back to an awkward default.</p>
<p>The shape is familiar if you have built AI-assisted tooling: keep control where you can, use the model where it helps, and put a human-readable artifact between stages.</p>
<h2>The Workflow I Actually Use</h2>
<p>The CLI can run end to end:</p>
<pre><code class="language-bash">jpresume convert resume.md --provider claude-cli --format both</code></pre>
<p>That works. But for most changes, I use the agent skill￼, because it supports the workflow I actually wanted: external mode.</p>
<p>In external mode, the LLM stages do not call a provider directly. They write a prompt bundle to disk and exit. An agent — Claude Code, Cursor, Codex, whatever you prefer — reads the bundle, produces the response JSON, writes it back, and re-runs the stage with --ingest.</p>
<p>The agent becomes the model.</p>
<p>That sounds like an implementation detail, but it changes the experience. The agent sees every prompt and every response. It can pause, ask me a question, fix a bad field, and re-ingest without restarting the whole pipeline. When it normalizes a role, I can see exactly how it interpreted the dates before anything downstream depends on them. If something is wrong, the fix is a JSON edit, not a full re-prompt.</p>
<p>This is the part I would have gotten wrong as a one-shot tool. For a first draft, one-shot generation is fine. For a document you might actually send to a company, the review loop is the feature.</p>
<h2>The Honest Limits</h2>
<p>JPResume has really only been tested on one resume: mine.</p>
<p>That resume has a specific shape. One country of origin. A software engineering career. Company names Japanese recruiters are likely to recognize. Relatively clean dates. A JLPT certification that maps neatly to standard phrasing. It does not cover every edge case: career switches, international graduate programs, long intentional gaps, unusual role titles, or industries where Japanese resume conventions differ from tech.</p>
<p>I would not be surprised if the first outside resume exposes something the normalizer handles poorly, or a phrasing pattern the generator does not produce gracefully. The pipeline is designed to make those fixes cheap — edit an artifact, re-run one stage — but I have not seen those cases yet. My sample size is one.</p>
<p>So if you try it and something looks wrong, or you know a resume shape it should handle better, I would genuinely like to hear about it. Issues, pull requests, or notes are welcome. The install instructions and agent skill are both in the README￼.</p>
<h2>What I Would Keep Even If the Tool Changes</h2>
<p>The part I expect to outlast this implementation is the shape: deterministic parsing, strict no-invention normalization, a deliberate validation pause, and external mode so an agent can act as the model while still reviewing its own output.</p>
<p>That pattern works beyond Japanese resumes. It fits any document where fabricated fields are expensive and a fully automated one-shot is the wrong abstraction: regulatory filings, contracts, internal reports, anything with structure and consequences.</p>
<p>For now, JPResume turns a markdown resume into a 履歴書 and 職務経歴書 that I would actually hand to a company.</p>
<p>A couple of months ago, that was the part I could not do.</p>]]></content>
  </entry>
  <entry>
    <title>Remote Dev Setup With Real Constraints</title>
    <link href="https://krisbaker.com/posts/remote-dev-setup-with-real-constraints/" rel="alternate"/>
    <id>https://krisbaker.com/posts/remote-dev-setup-with-real-constraints/</id>
    <updated>2026-04-01T12:00:00Z</updated>
    <published>2026-04-01T12:00:00Z</published>
    <content type="html"><![CDATA[<video autoplay muted loop playsinline>
  <source src="https://krisbaker.com/posts/remote-dev-setup-with-real-constraints/claude-train.mp4" type="video/mp4">
  <img src="https://krisbaker.com/posts/remote-dev-setup-with-real-constraints/claude-train.png" alt="Claude Code running on a phone on a train">
</video>
<p>I wanted to pull out my phone on a train in Japan, reconnect to a dev session running on my Mac at home, and keep working. That is not such a strange thing to want anymore. But getting it to actually work, reliably, from a phone, without blowing up my existing setup, turned out to be the interesting part.</p>
<p>And then, right around the time I got it working, Claude Code shipped <a href="https://code.claude.com/docs/en/remote-control">Remote Control</a> and <a href="https://support.claude.com/en/articles/13947068-assign-tasks-to-claude-from-anywhere-in-cowork">Dispatch</a>. More on that later.</p>
<h2>Why Not Just Use Tailscale?</h2>
<p>If someone told me they wanted private remote access to their personal machine, I would probably tell them to use Tailscale and move on with their life. It is a great tool. For plenty of people it is the whole answer.</p>
<p>But my situation was a little stranger than that. My Mac runs a work VPN, and I did not want to mix personal and company Tailscale accounts on the same machine. I did not want to expose my home network to inbound connections from the public internet. And because I planned to use this from my phone, often on mobile data between Wi-Fi networks, I needed the connection to survive the kind of interruptions that kill a normal SSH session.</p>
<p>Any one of those constraints alone would be easy to work around. Stacked together, they started ruling out the cleaner-looking options. What remained was not the most elegant diagram. It was the version that actually fit.</p>
<h2>The Shape of the Thing</h2>
<p>The final setup is a chain, and each link exists for a specific reason:</p>
<pre class="mermaid">flowchart LR
    phone[Phone]
    mosh[mosh]
    vps[VPS]
    reverse[reverse SSH]
    mac[Mac]
    tmux[tmux]
    tools[Claude Code]

    phone --&gt; mosh --&gt; vps --&gt; reverse --&gt; mac --&gt; tmux --&gt; tools</pre>
<p>My phone connects to a small VPS using <code>mosh</code>, which handles the part that plain SSH is terrible at on mobile networks: changing IPs, switching between Wi-Fi and cellular, and recovering from drops without leaving you staring at a frozen cursor. The VPS is the only thing with a public address. My Mac reaches it through an outbound reverse SSH tunnel, which means the Mac never needs to accept inbound traffic from the internet at all. And <code>tmux</code> on the Mac turns the whole thing from a fragile connection into a persistent session I can detach from and come back to later.</p>
<p>That last part surprised me. Once the session itself became durable, the phone stopped feeling like a limited access path. I was not reconnecting to a machine. I was stepping back into work that was already in progress.</p>
<h2>Where It Actually Broke</h2>
<p>Most of what I learned came from the failures, not the original plan.</p>
<p>The reverse tunnel could go half-dead after sitting idle. Port 22 was still listening on the VPS. The connection looked fine. But the session behind it had quietly gone stale, so jumping to the Mac would just hang. What fixed it was not a single setting. It was treating liveness as a real concern on both sides. SSH keepalives from the Mac, <code>autossh</code> to rebuild the tunnel when it dropped, and a VPS-side script that checked whether <code>localhost:22</code> was actually responsive before attempting the jump.</p>
<p>That jump script was its own lesson. The first version tried to SSH into the Mac every time I connected to the VPS. Fine when the tunnel was up. Completely useless when it was not, just a hanging shell with no feedback. The better version checked the port first, used a short connect timeout, and dropped me into a normal VPS shell as a fallback. Small change, but it turned an unreliable experience into one I could trust.</p>
<p>Then there was <code>tmux</code>. A session created under one terminal environment did not always attach cleanly from another. In my case, <code>xterm-ghostty</code> on the Mac caused problems when the same session got reattached from a mobile client. Setting a more portable default terminal type fixed it, but it was a good reminder: persistent sessions are only as portable as the assumptions baked into them.</p>
<p>None of these were dramatic. They were just the kind of half-solved problems that turn a clever setup into one you stop using after a week.</p>
<h2>And Then the Tooling Caught Up</h2>
<p>Right around the time I had this working reliably, Anthropic shipped two features that cover a lot of the same ground.</p>
<p><a href="https://code.claude.com/docs/en/remote-control">Remote Control</a> lets you continue a local Claude Code session from your phone or any browser. It runs on your machine (your filesystem, your tools, your project config) with the phone just acting as a window into that session. No port forwarding, no VPS, no reverse tunnel.</p>
<p><a href="https://support.claude.com/en/articles/13947068-assign-tasks-to-claude-from-anywhere-in-cowork">Dispatch</a> goes further. You message a task from your phone, and it spawns a session on your Mac to handle it. You do not even need to have a session running already.</p>
<p>So did I waste my time? Honestly, I do not think so. Remote Control is limited to one connection per session and times out after about ten minutes of network loss, which is not ideal if you are on spotty mobile data on a rural train line. My setup survives longer outages because <code>mosh</code> and <code>autossh</code> were designed for exactly that. And the VPS gives me a general-purpose foothold that is useful beyond just Claude Code. It is a place to land when I need a shell, period.</p>
<p>But if I were starting fresh today with a stable connection and only needed Claude Code access from my phone? I would try Remote Control first and probably never build any of this. That is worth being honest about.</p>
<h2>The Lesson Worth Keeping</h2>
<p>I keep running into this pattern, with infrastructure, with AI tooling, with the house we built last year. The first version of an idea usually looks clean because it has not met reality yet. What survives contact with real constraints looks a little stranger, but it is the version that holds up.</p>
<p>What is also true is that sometimes the tools catch up and the constraints shift underneath you. The setup I built is still useful to me. But the reason to write about it is less &quot;here is what you should build&quot; and more &quot;here is what I learned by building it.&quot; The constraints shaped the system. Understanding why each piece existed made it easy to know which pieces I could drop once better options showed up.</p>
<p>That is the part worth keeping, even after the tools change.</p>]]></content>
  </entry>
</feed>